Check out these adorable candles made from thrift store tea cups. They are adorable, very thrifty and a great way to upcycle your old cups and mugs. I loveee it! You can find the full tutorial here at the Pie Bird Blog.
Showing posts with label upcycling:. Show all posts
Sunday, October 24, 2010
project: tea cup candles
Labels:
projects:,
upcycling:
Thursday, October 21, 2010
upcycling: toilet paper rolls
While searching the web today I found a bunch of great ways to upcycle a little old toilet paper roll... who knew?
Check out this amazing wall art from creativejewishmom.com.
How about this idea for an extension cord holder from http://www.apartmenttherapy.com/. What an ingenious idea this is! I love it!
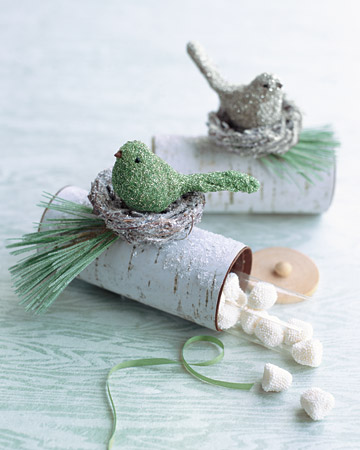
And Martha Stewart is at it again with these fabulous Yule Log Favor Boxes. How cute would these be at your Christmas party this year?!?
Mayamade has a tutorial for both of these adorable countdown calendars on her site. I am definitely making one of these for Christmas!
Labels:
upcycling:
Tuesday, October 19, 2010
project: tin can luminaries
Things Needed:
Empty vegetable or soup cans, cleaned out and labels removed
Water
Nail
Hammer
Towel
Halloween clip art
Tape
Spray paint
1. Begin by filling the cans up to the top with water, then place them in the freezer until the water is frozen solid. This will allow you to hammer a nail into the side of the can without the can denting. The bottom of your cans might bulge out but don't worry, you can hammer them flat after you are done with your design and the ice has meted.
2. Next, get your designs and or clip art ready. I traced some Halloween cookie cutters for mine. Cut a square around your templates, place on the can and tape into place. If you would like to use my templates click here.
3. Begin to make the tin can luminaries by using a nail and hammer to punch out the design. Start at one end of the pattern and place the nail along the line. Gently pound the nail in with a hammer. The nail will go through the can into the ice. Continue working around the pattern until the design is punched out.
4. Run your can under hot water to melt the ice and then dry the can completely. If the bottoms of your tin cans bulged during freezing now would be the time to put a towel over the bulge and hammer it back into place.
5. Next, spray paint your cans inside and out. Protect your work surface with newspapers and use good ventilation.
6. When your cans have dried you are ready to illuminate, add a little sand to weigh them down and add a tea light candle.
Enjoy!!!
Labels:
projects:,
upcycling:
Wednesday, October 13, 2010
Monday, October 11, 2010
upcycling: glass jars
Check out this awesome tutorial at Gingerbreads Snowflakes for upcycling your old kitchen jars into these pretty colored glasses.
Labels:
projects:,
upcycling:
Friday, August 6, 2010
project: plarn.
This looks like a fun and very green project! Get directions on how to make it here.
Also, here is a video to show how easy it is to make the plarn. Sadly, I can't knit so I am gonna explore more ideas for using plarn as I have way too many plastic grocery bags lying around.
Labels:
projects:,
upcycling:
Thursday, August 5, 2010
Subscribe to:
Posts (Atom)